Find the Recording
Start at the Project Management screen. Tap on a Project bar to edit.
Tap on the Chapter bar. The Chapter Management screen opens - see the list of verses/chunks.
Tap the right arrow at the end of the verse bar.
The take management bar opens. (A ‘take’ is the word that refers to a recording.) It is now possible to work with the recordings from this verse.
Tap the right or left arrow to go between the audio takes for a verse. Notice that the take number changes.
Verse/Chunk Take Bar
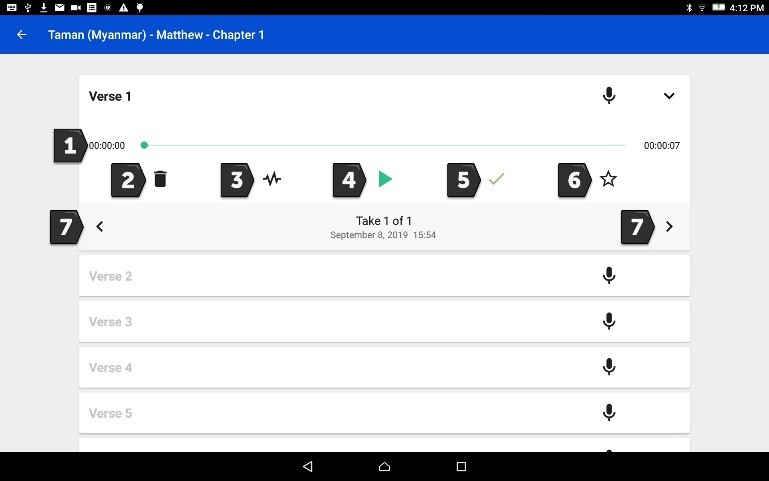
The items in the verse take bar are (listed top to bottom and left to right):
The time line of the length of the audio take. The dot moves left to right as the audio take plays.
Garbage can icon - Delete a selected take. Notice that the numbering of the takes changes to reflect the lower number of takes now available.
Waveform icon - Opens the editing screen of BTT Recorder.
Play icon - Play the recording. Tap the Pause icon (replaces the Play icon) to stop the recording.
Checkmark – Tap to turn green, or if green, tap to turn black. The green color means that the take is approved to use. When the take is rated 3 stars, this checkmark is green, or you can just tap it to turn it green. Only one take per verse or chunk can be marked with a green checkmark.
Star icon - Tap the star icon to rate the recording.
Left or right arrow - Navigate through the takes for a different take. Notice that the take number changes.
Go to the next topic - Edit the Recording to learn how to edit the recordings in BTT Recorder.